Friday, July 20, 2018

Portrait Speed Paint

Hey guys welcome back to the figure drawing blog! Today I'm showing y'all another speed paint. The focus of this video is going to be cartoon portraiture. Please enjoy!
Some tips demonstrated in the video for drawing good cartoon portraiture is :

1) draw the simple shapes that make up the face in your sketch
2)always exaggerate and change reality
3) When doing line art have varying line width!

Program used : Paint Tool Sai

Reference used : https://www.experience-parapente.com/att/lighting-reference-3-face-lighting-reference-8-by-faestock/

Song : Imani Coppola - Soon( I Like It)

Wednesday, July 18, 2018

Drawing timelapse

In this video I show you a sped up process of how I draw cartoon figures! Enjoy!

Tools used - Paint Tool Sai and Wacom Intuous Tablet
Song Used: Kero Kero Bonito _ Forever Summer Holiday
Referenced used : https://www.deviantart.com/art/Just-What-I-Needed-Pose-Reference-for-Drawing-600032258

Finishes Image :


Wednesday, July 11, 2018

Top six tools to use for figure drawing outside1!


Do you want to do life drawing on the go and draw human beings in a place that’s not a stuffy classroom or your dirty bedroom? Well I have the tools to help achieve that crazy dream! Here are the top tools and programs that’s great for drawing on the go!
Image result for etchr bagRelated image
(all images from etchr labs)
1)      The Etchr-Etchr  is an art bag designed by artists and made by artists. This bag has everything you need to draw on the go! Do you need an easel to draw but don’t want to lug around a heavy bulky object? Just bring a small tripod, attach it to the bag, and you have an amazing easel! Need a computer bag for doing digital art at the coffee shop? Just open the back zipper and you have a snug place to fit your computer! Want to bring your entire studio space and compact it into a small modular bag? The etcher is exactly what you need. This bag is amazing! Every bag comes with many modular straps and tons of Velcro, so you can customize your bags set up with ease. I use the Velcro straps to hold my sketch book in place to draw as well as using them to hold my pencils! go get yours today!


Image result for procreateImage result for procreate
((All images from procreate website)
2)      Pro Create + Apple Pencil  procreate is an amazing painting app for the iPad. It’s a great program to draw on the go due to its simple UI design and tons of brushes that simulate traditional mediums! I even used to procreate for my step by step figure drawing guide located here. Procreate is great for painting as well as line arting with its many ink brushes. These brushes automatically correct your lines while you draw so you will always produce super clean lines instead of a wobbly mess! On the painting side procreate blends colors well and has brushes that simulate acrylic, graphite, pastels and oil colors. The only con about this program is the fact that it does not have a clipping mask feature that’s prevalent in Photoshop and paint tool sai. This makes digital layer organization and coloring in the lines a lot harder than in other programs. Using the apple pencil with this program is a must or you will never obtain that sweet sweet pressure sensitivity aka your lines will forever hold the same weight! The apple pencil is great and has a nice soft plastic tip that won’t scratch up your iPad. You can also charge it on the go as simply plugging the pencil into your iPad will charge your pencil. Other than the layer problems and needing to use the apple pencil, please give procreate a try!
Related image
(art by Anna Cattish)

3)      Gouache paints  Gouche is a very traditional tool that is useful on the go. Gouache is super pigmented paints that are between acrylics due to how opaque they are, and watercolors. Gouache is great for painting on the go due to its easy clean up and set up. Everything about these paints are water soluble so you can easily clean up the mess you make after painting. Another plus about this medium are its reactivation properties. Gouache is the only medium that will let you blend your colors together even after they have dried! That means you can stop midway in a painting and simply pick up where you left off without any of the grievances that acrylics have due to drying way to fast as well as not being able to reactivate and oil colors that take way too long to dry. The only downside about gouache paints is the fact that they are very expensive for only 5ml tubes of paint. The typical price is 10-20 and up for a tube of paint depending on the color.
Image result for Moleskine sketchbook
((images from utretcht art supplies)
4)      Moleskin Sketchbook Moleskins are small yet high quality sketchbooks great for travel. Most sketchbooks are big and bulky, but Moleskins can fit into wallets purses and even wallets. Moleskins also come in different varieties. 

  . Like to write? Get the lined paper Moleskins . Love to draw and use graphite, buy the standard Moleskin
! I use my Moleskin watercolor sketchbook on the daily, due to be such good quality. The binding has never fallen apart on me and the leather covers feel nice to touch! Moleskins ever con with a book bank that can help keep your sketchbook closed, or you can use it as a book mark to keep your place!

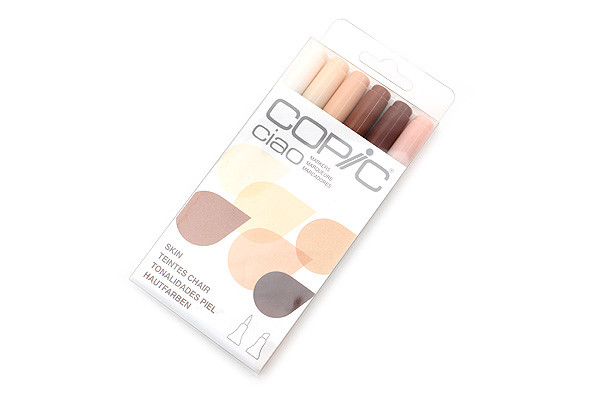
Copic Ciao Marker - 6 Color Set - Skin - COPIC I6SKINRelated image

((images from jet pens and tanukiartshop)
5)      Copic Ciao markers The price may be high for these art markers, but they’re blend-ability and portability cannot be beat. Typical markers give you streak lines and its hard to put down solid colors. Since Copic marker are alcohol based, you’ll never have this problem until your marker runs out of ink. Copic ciao markers are the smaller versions of the bigger Copic markers, so they are even more portable than normal and easily fit into pockets and small bags. The only down side is that the portability goes down the more colors you want to have on your person. I always recommend bringing only monochromatic colors with you when you are drawing on the go. That way you still have a nice range of values, without bring the entire rainbow of markers with you for travel. Check out the Copic Ciao
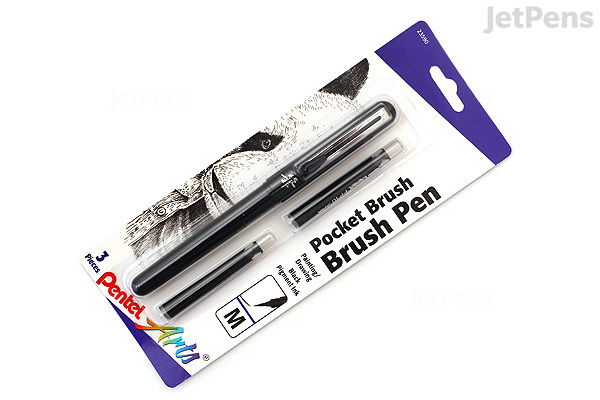
Pentel Pocket Brush Pen GFKP3BPA - PENTEL GFKP3BPA
(Image from Jetpens.com)
(
6)     Pentel Pocket Brush Pen If your just outside for some simple sketches this brush pen is perfect for you. Small portable and can fit in your pants pocket, this brush pen holds the darkest of Indian ink, just so you can draw on the go. You don’t have to deal with the messy process of dip pens when the ink is in small easy to change out cartridges! You can find a Pentel Pocket Brush Pen  online!
Hopefully I have expanded your already long list of need to grab art supplies! Tell me how these supplies have worked for you in the comments below!

Wednesday, July 4, 2018

How to draw the figure in 5 simple steps


Step 1
Pick out the proper reference image you want to figure draw. This image is a picture of myself taken by friends. Your reference images can come from anywhere, from real life to pictures on the web! Then decide what tools your going to use. You can use any material you see fit. For the purpose of this tutorial I have used procreate, an iPad app for digital art.


Step 2
You need to draw out the flow of your figure, this will be a loose stick figure. Draw fast and don’t spend too much time in this phase. This phase is only meant to plan out what your drawing quickly as well as to emphasize how the body is stretched. In this image I only drew 4 lines to show the flow of the arms, torso, and legs.


Step 3
Block out your figure using simple shapes. Your shapes should flow with the previous lines you have drawn. This phase is also a fast phase as it should take you no longer than 45 seconds to draw it all out. Phase 3 is also important because you will be blocking out the proportions of the body. Decide how big the torso, head, arms legs etc. everything should be. Once you’re done with this step walk a couple steps away from the surface you are drawing on and consider if everything looks proportional to the model. Make your corrections now, as it’s harder to fix things the more you draw. Once you’re done making your corrections, you’re ready to move on.


Step 4
This step is all about adding volume to your figure. Make your drawing more 3d by drawing geometric forms over your base drawing in step 3. Draw cylinders to get the perspective right on the foreshortened legs and arms, use spheres for the head and torso, and boxes for the hips. Be sure to draw through your figure as well. Drawing through is basically adding the insides to your drawings, so you can better draw the outsides. Take note of how I have drawn curves throughout my body to show the form. This is my way of drawing through the figure.


Step 5
This is the final step you have been waiting for, drawing the contours or the outside of the figure. In this step draw out all the details of the figure. Draw all the bumps in the muscles down to the eyelashes and eyebrows of the face. Previous steps were focused on the big picture, but this step focuses on the little details to make your drawing come to life. After this you can also shade the figure and add value, but for this tutorial I decided to only focus on draftsmanship and not shading.

Monday, June 25, 2018

Top Ten Tips For Beginning Figure Drawers


Hi everyone, welcome to the first entry on The Figure Drawing blog! Today's topic is a short and sweet list of helpful tips that'll make you a better figure drawer. These tips will help prepare you young artists for drawing before your figure drawing sessions begin.

 Right-posture-straight

1)      Have a proper drawing posture! It’s important for a young artist not to strain themselves while drawing to prevent things such as carpal tunnel. To keep drawing for longer you must get in the habit of having a proper drawing posture when sitting or standing!  When sitting and drawing an artist should always have their back straight, and not bent. This will help prevent any back strain, as its detrimental to stay crouched over a drawing for many hours at a time. It’s important to also draw using your whole arm and not just your wrist to prevent carpal tunnel from repetitive drawing motions. Drawing with your whole arm can contribute in giving your drawings more fluid lines, as well as helping you to draw bigger on whatever surface your using to draw the figure.
Image result for pen

2)      Work with what you know If you’re just learning how to draw the human body, why make it harder for yourself by using materials you don’t know how to use yet? Focus on drawing accurately instead of testing out those new markers you bought at hobby lobby the other day. It will make your drawing way better, and you’ll be more focused as well.

3)      Prepare all tools before hand Figure drawing is very fast pace. Many times, during a session you will only have 30 seconds to draw the entire body. Why waste that precious time on trying to find the proper materials to draw with? Make sure before every figure drawing session you bring the essentials to the medium you’re working with. This means bring paper towels to erase your drawing before hand if using charcoal and newsprint paper or bringing your own bottle of water for water color figure drawings.

 These images represent some of the aspects to be considered in life drawing: Accuracy, Design, Rhythm/animation, Form
4)      Work big to small Many young artists get caught up in the details way to soon and end up neglecting proportions or run out of time to draw the entire body. That’s why it is important to draw the big shapes of the figure first such as the torso legs and arms, before you draw the small shapes (know as secondary and tertiary forms) such as the eyes or fingernails. When your draw the big shapes in their entirety using simple shapes, you will be able to nail down the proportions properly because you can see the figure as the whole instead of just its parts.
The Art Critique ow it is. How l perceive it: Good effor work on Shadin). You are a bad human beira and also You are a.

5)      Always ask for critique to improve your figure drawings, you must seek to improve yourself, and that means asking others for advice. Never be ashamed or afraid to show your drawings to others and receive feedback because their eyes may see something that you missed! If you have no one around to look at your figure drawings, try to critique and questions what you could have done better and how you should fix it, that way you will never stop improving!

Image result for figure drawing break down
6)      Break down complex poses Confused on a pose with a lot of foreshortening, twisting, or stretching? Try break down the pose into simple shapes and forms. Breaking down the body into its most simple shapes will help you to feel less over whelmed during complicated poses because you’ll better understand the pose. After you have drawn all the simple shapes go back into the drawing and add the detail on top to best replicate that complex pose.
750 отметок «Нравится», 3 комментариев — Diego Lucia (@diluc) в Instagram: «Thanks for all your support!!! I'm doing my best to reply all the DM as fast as I can. Be patient…»Image result for diluc
Art by Diluc

7)      Look at other figure artists Confused on how to stylize or interpret the figure? Look at other artists and how they interpret the figure. Learn from other artists around you and how they do things to gain an understanding of how you want to interpret the figure. After all your figure drawing style is an accumulation of everything your inspired by. 

(Cartoons by Richard Williams’ in “The Animators Survival Kit”)
8)      Silence is bliss Turn off the music while your drawing the figure. You’ll be able to pay attention more when drawing the details as your brain is only focusing on drawing and not the background music. A famous animator once said he doesn’t listen to music because he is not smart enough to focus on two things at the same time.
Image result for looking at painting easel

9)      Take a step back When drawing the figure always take a step back. Constantly checking your progress during a long drawing session is vital to making sure your figure proportions are correct. If you never take a step back occasionally it’ll be harder to fix mistakes you have made earlier on. You don’t want to realize at the last moment that you made the head too big when you’ve already started to shade the figure!
Image result for algenpfleger old art
(Image by Johannes Voss Old art collection)

10)  Never throw away your figure drawings It’s important to keep track of all the effort you have put in to drawing! Collect every drawing you think is good, bad or rad. Then when you look back upon your past work you’ll be able to see your growth. Seeing your improvement is important because it’ll encourage you to keep improving and striving to be better than your pat self!

Hopefully these ten tips will help you among your figure drawing journey, keep drawing folks! Comment down below with your own personal figure drawing tips! I would love to see what you all do to improve!

“Are You Drawing with a Correct Body Posture ? - ⭐️ The Design Sketchbook.” THE DESIGN SKETCHBOOK | INDUSTRIAL DESIGN TUTORIALS, 3 May 2016, www.thedesignsketchbook.com/what-counts-as-good-drawing-posture/.
“L1 - Life Drawing.” Scott Breton Fine Artist, www.scottbreton.com.au/lesson-1/.
http://sarahcandersen.com/

Chelsea Magazine Company. “Sign In.” Artists & Illustrators Magazine, www.artistsandillustrators.co.uk/how-to/Unknown/684/how-to-choose-life-drawing-materials.

Portrait Speed Paint

Hey guys welcome back to the figure drawing blog! Today I'm showing y'all another speed paint. The focus of this video is going to b...